Homebrewing looks intimidating from the outside — boiling kettles, mysterious gravity readings, weeks of waiting. But peel back the mystique and what you have is a straightforward process that millions of people do in their kitchens and garages every weekend. If you can follow a recipe and keep things clean, you can brew good beer. This guide is your complete starting point.
How Brewing Actually Works
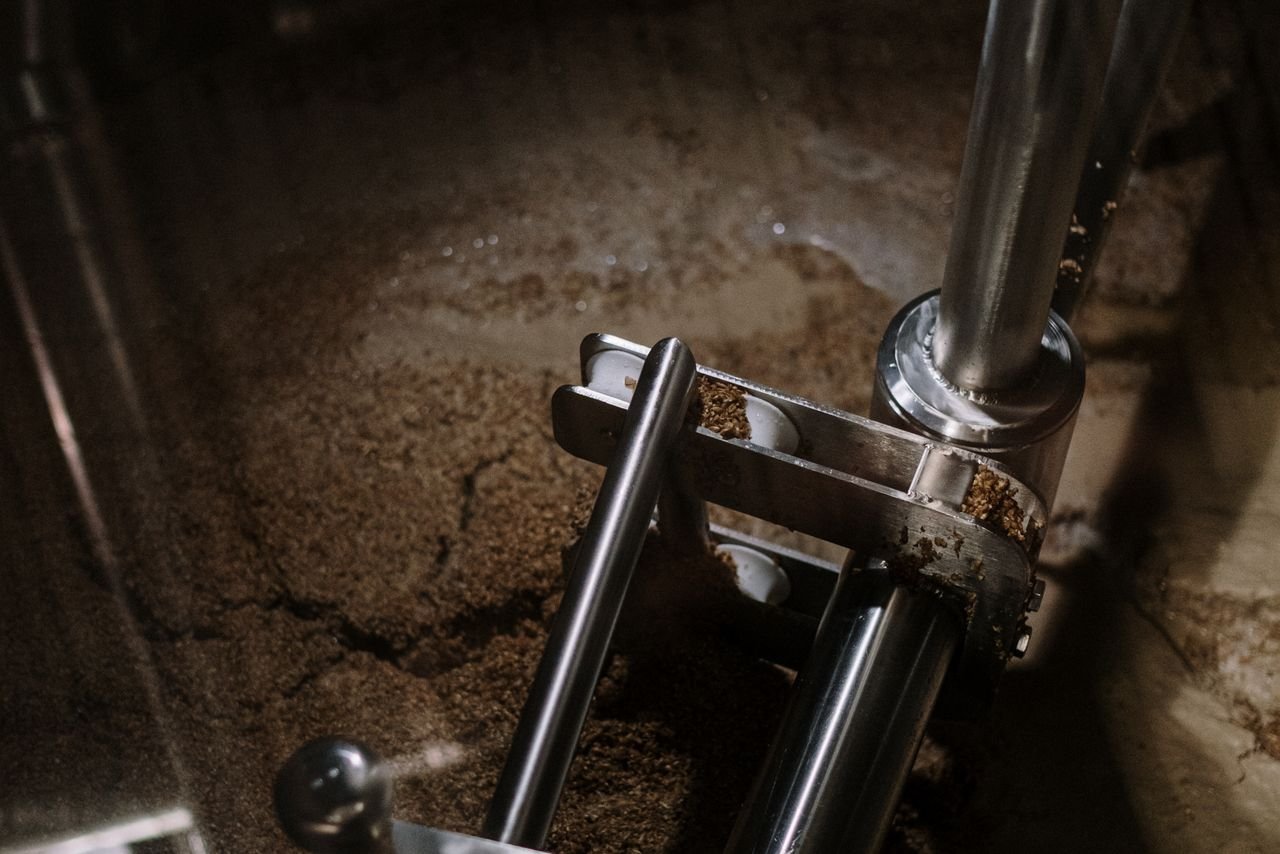
At its core, beer is fermented grain water. You steep or mash malted barley to extract fermentable sugars, boil the liquid (now called wort) with hops for bitterness and aroma, cool it, add yeast, and wait. The yeast eats the sugars and produces alcohol and carbon dioxide. That’s it.
The American Homebrewers Association estimates there are well over a million active homebrewers in the United States alone — proof that this is not a niche craft but a mainstream hobby with a huge, generous community behind it.
Three main approaches exist, in increasing order of complexity:
- Extract brewing — you use pre-made malt extract (liquid or dry) instead of mashing raw grain. Fastest and simplest.
- Partial mash — a hybrid: some specialty grains are mashed alongside extract. More flavor control.
- All-grain — you mash 100% of your grain bill yourself. Maximum control, steeper learning curve.
For your first batch, extract is the right choice. You’ll still make real, delicious beer.
The Gear You Actually Need
You don’t need a $5,000 system. A starter kit running $100–$150 gets you everything for your first batch. Here’s what matters:
| Item | Why it matters |
|---|---|
| 7–8 gallon kettle | Room for a full 5-gallon boil without boilover |
| 6.5-gallon fermenter + airlock | Houses your beer during fermentation |
| Auto-siphon & tubing | Transfers beer without oxidation |
| Hydrometer | Measures sugar content / ABV |
| Thermometer | Precise temperatures prevent off-flavors |
| Star San sanitizer | Kills spoilage organisms without rinsing |
| Bottle capper + caps + bottles | Packages your finished beer |
For a more detailed breakdown, see our guide on homebrewing equipment for beginners.
Sanitation: The One Rule You Cannot Skip
More beers are ruined by poor sanitation than by any other mistake. Every piece of equipment that touches your wort after the boil must be sanitized. Star San (a no-rinse phosphoric acid sanitizer) is the industry standard. Mix it at 1 oz per 5 gallons of water, coat everything, and don’t rinse — “don’t fear the foam” is homebrewer gospel for a reason.
Cleaning and sanitizing are two different things. Clean first with a non-scented cleaner like PBW or OxiClean Free to remove residue, then sanitize. Shortcuts here are the single biggest source of off-flavors and ruined batches.
Ingredients: A Quick Primer
Malt extract — your fermentable sugar source. Liquid malt extract (LME) and dry malt extract (DME) are both effective; DME stores better and is easier to measure accurately.
Hops — added during the boil. Bittering hops (added at 60 minutes) contribute IBU; flavor hops (15–20 min) and aroma hops (flameout or dry-hop) add complexity. The Brewers Association publishes free resources on hop varieties and their flavor contributions.
Yeast — the living organism doing the actual work. Dry ale yeasts like Safale US-05 (clean, neutral) or Safale S-04 (English character) are forgiving and reliable for beginners. Store unused packets in the fridge.
Water — your largest ingredient by volume. Filtered tap water or spring water works well for starters. Chlorinated municipal water is fine as long as you’re boiling it.
Your First Brew Day, Step by Step
Plan for 4–5 hours on your first brew day, and don’t rush it.
- Clean and sanitize all equipment before you start anything else.
- Heat 3 gallons of water to 155–160°F (68–71°C) and steep any specialty grains in a mesh bag for 20–30 minutes. Remove grains and let drain.
- Bring to a boil, remove from heat, stir in malt extract until fully dissolved, return to boil.
- Start your 60-minute timer, add bittering hops, maintain a rolling boil.
- Add flavor and aroma hops at the times called for in your recipe.
- Chill the wort to below 70°F (21°C) as fast as possible — an ice bath in a sink works for a starter batch; a dedicated wort chiller is faster.
- Transfer to fermenter, top up to 5 gallons if needed, measure original gravity with your hydrometer, aerate the wort (shake or rock the fermenter), and pitch the rehydrated or dry yeast.
- Seal with an airlock, label with the date and beer name, and move to a steady 65–70°F location.
John Palmer’s free resource at How to Brew covers every one of these steps in thorough technical detail if you want deeper reading.
Fermentation: How Long to Wait
Primary fermentation typically completes in 1–2 weeks for most ales. Bubbling in the airlock will slow dramatically as the yeast finishes its work. Don’t rush this stage.
Use your hydrometer to confirm fermentation is done: if your final gravity reading is stable across two measurements taken 48 hours apart — and matches your recipe’s expected final gravity — you’re ready to package. Typical final gravity for an ale falls between 1.008 and 1.015, depending on the recipe.
Fermentation temperature matters enormously. Too warm (above 75°F/24°C) and your yeast produces harsh fusel alcohols and off-flavors. Too cold and the yeast may stall. A basement, a temperature-controlled fermentation chamber, or even a water bath with ice packs can keep things in range.
Carbonation: Bottles vs Kegs
Beginners typically bottle-condition their beer. Dissolve about 4–5 oz of corn sugar (priming sugar) in 2 cups of boiled water, let it cool completely, gently stir it into your finished beer, and bottle immediately. Cap tightly and leave at room temperature for two weeks before refrigerating.
Kegging is a significant step up in convenience once you’re hooked on the hobby — but it involves more upfront cost (keg, CO₂ tank, regulator, fittings). Many homebrewers bottle their first several batches and switch to kegs once they know they’ll keep brewing.
The BJCP Style Guidelines are worth bookmarking — they describe the flavor, appearance, and carbonation levels for over 100 recognized beer styles, giving you a target to aim for with each recipe.
Tasting and Learning
Your first beer will almost certainly have some rough edges, and that is completely normal. Taste it critically and ask: What do I like? What’s off? Common beginner issues include:
- Buttery or butterscotch flavor — diacetyl, often from fermentation temperature swings
- Cidery taste — too much sugar in the recipe, or fermentation too warm
- Thin body — mash temperature too high or extract rate too low
Each flaw is a lesson. CraftBeer.com has a solid off-flavors guide that maps symptoms to causes. BeerAdvocate reviews and forums are also excellent for building vocabulary around what you’re tasting.
The Brew Professor Takeaway
The best thing about homebrewing as a beginner is that even mediocre homebrew is impressive to most people — you made beer! But you won’t stay mediocre for long. The process teaches you quickly, and each batch is measurably better than the last. Start with an extract kit, keep everything clean, control your fermentation temperature, and take notes. That recipe log will be worth more than any piece of equipment you buy.